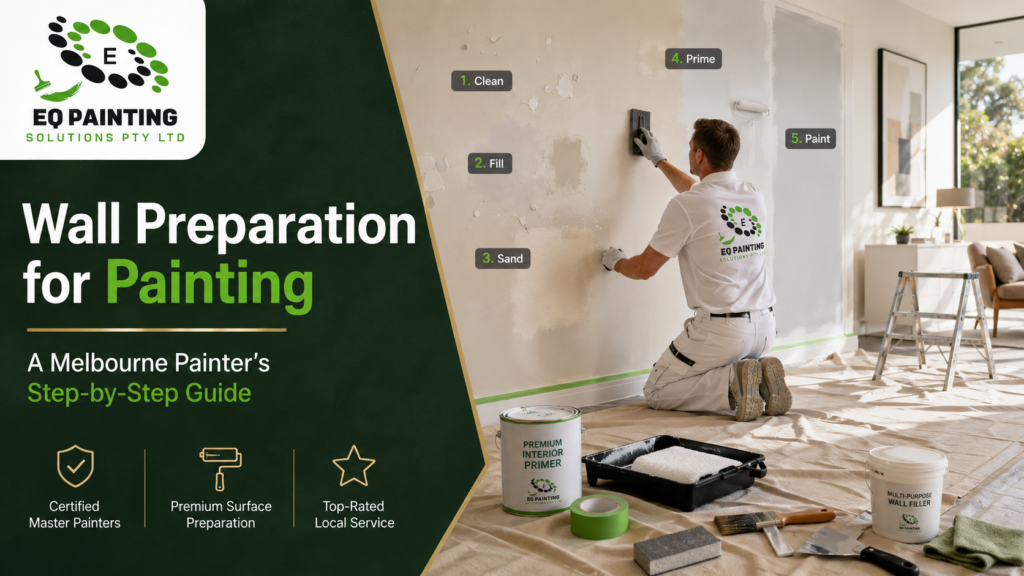
Ask any painter what actually decides how a paint job looks and how long it lasts, and almost none of them will say the paint. It’s the prep. On most of the interior jobs we quote around Melbourne, the actual painting is the fast part; it’s the wall preparation for painting beforehand that separates a finish that looks sharp for years from one that shows every patch, crack and imperfection the moment afternoon light hits it. This is the exact order we work in on site, and what each step is actually for, so you can either do it properly yourself or know what to check a painter is doing.
Quick answer: Good wall preparation means cleaning the surface, treating any mould, filling holes and cracks, sanding the repairs flush, removing all dust, and spot-priming bare or stained areas, in that order, before the finish coats go on.
Why Wall Prep Matters More Than the Paint
Paint is thin. It follows the surface underneath it rather than hiding it, so a bump, a filled hole that wasn’t sanded flat, or a greasy patch near a light switch will still be visible through two coats of premium paint, and side lighting from a window makes those flaws stand out even more. Good prep is also what stops paint peeling, flaking or blistering later, because most of those failures start with a surface that was dirty, glossy or damp when the paint went on. Spend the time here and the painting itself becomes the easy, satisfying part.
Step 1: Clear and Protect the Room
Move furniture out or into the centre and cover it, take down switch plates and wall fittings, and run painter’s tape along skirting, architraves and the ceiling line. Drop sheets on the floor, cloth rather than plastic where you can, since plastic gets slippery underfoot. Two minutes of masking saves a lot of cutting-in grief later.
Step 2: Clean the Walls
Almost every wall needs a wash, even ones that look clean. Dust, cooking grease, hand oils around switches and door frames, and airborne residue all stop paint gripping properly. For general walls, warm water with a little sugar soap on a sponge is enough; rinse with clean water and let it dry fully. Kitchens need more, because cooking grease is the number one cause of paint not sticking, and it’s often invisible until fresh paint starts lifting; a stronger sugar soap or degreaser on the splashback zone and around the stove is worth the extra effort.
Step 3: Treat Any Mould First
In Melbourne’s cooler, damper months we see a lot of mould in bathrooms, laundries and on south-facing walls. You can’t just paint over it; it grows back through the new paint. Treat it before filling or sanding, with a proper mould killer rather than just bleach, which often only lightens the surface and leaves the spores behind. Just as important, work out why the area got damp in the first place, whether that’s condensation, poor ventilation, a plumbing leak or moisture coming in from outside; if the source stays, the mould comes back through the fresh paint. Let the treated surface dry completely before you go any further. If mould keeps returning, it’s worth reading our guide on mould-resistant paint alongside this.
Step 4: Fill Holes and Cracks
Small nail holes and hairline cracks take a lightweight interior filler; press it in firmly, slightly overfill so it can be sanded flush, and let it dry. Larger cracks, especially the recurring ones above doorframes and windows in older Melbourne homes that move with the seasons, need a flexible filler and sometimes a second pass once the first shrinks back. Deep holes are better built up in two thinner layers than one thick one, which sinks and cracks as it dries. Let filler dry fully before sanding, sanding it while it’s still soft pulls it out of the repair and leaves a hollow.
Step 5: Sand Smooth
This is the step that makes the biggest visual difference. Once filler is dry, sand it flush with the surrounding wall and give the whole wall a light key so the paint has something to grip. A medium grit around 120 to 150 knocks back filler and rough spots; finish with a finer 180 to 220 for a smooth surface. On a sound existing wall, a light scuff with fine paper is often enough on its own. Sand in a circular motion, run your hand over each repair to feel for raised edges a flat-on look misses, then wipe every trace of dust off with a damp cloth or a vacuum, because painting over sanding dust leaves a gritty finish and hurts adhesion. If dust is a concern, a sanding block with a vacuum attachment keeps it far more contained than dry hand-sanding.
Step 6: Spot-Prime Where It’s Needed
Not every wall needs a full priming coat, but any bare filler, patch, water stain or glossy area does. Filler and fresh plaster are more porous than the wall around them and will flash (dry to a duller, different sheen) if painted over directly, so spot-prime them. Water stains need a stain-blocking primer or they bleed back through, and glossy or previously enamelled surfaces need a bonding primer to grip. Bare timber, new plasterboard and big colour changes are on that list too. We cover exactly which surfaces need it in our detailed guide on whether you need to prime before painting.
Step 7: Inspect the Wall Before You Open the Paint
When the prep is done, don’t reach straight for the roller. Stand back and look across the wall under good light, ideally with light raking in from the side, which throws shadows off dents, sanding marks, filler edges and cracks that vanish when you look at the wall straight on. Run your hand over the repairs as well. The wall should feel smooth, clean, dry and stable. Anything obvious now will almost certainly still be there under the first coat, and it’s far easier to fix before the colour goes on than after.
Wall Preparation Checklist
Before the finish coats go on, check that you’ve:
- Cleared and protected the room
- Cleaned off dust, grease and surface grime
- Treated any mould and found the moisture source
- Filled holes, cracks and damaged areas
- Sanded every repair flush with the wall
- Removed all sanding dust
- Spot-primed bare and problem areas
- Checked the wall under side lighting
What This Looks Like on a Real Melbourne Job
On a standard three-bedroom repaint in somewhere like Brunswick or Preston, prep is usually the better part of the first day: check the walls for damage, wash them down, treat any bathroom or laundry mould, fill the seasonal cracks over the door frames, sand the whole lot back smooth, vacuum, then spot-prime the patches. Only then does colour go on. It feels slow while you’re doing it because there’s no instant transformation, but it’s the reason the finish still looks clean and even years later.
Can You Prepare Walls Yourself?
Yes, especially if the walls are already in reasonable shape. For a straightforward room with a few nail holes and light marks, careful DIY prep gets a genuinely good result. The key is not rushing. Most DIY problems come from the same handful of shortcuts: filling a hole and painting before it’s dry, skipping the clean, not sanding the repair flat, or assuming the topcoat will hide it. It usually won’t. Trickier surfaces, recurring cracks, peeling coatings, water stains, heavy mould, damaged plaster or an unknown existing coating, are worth having assessed before you repaint.
Hiring a Painter? Check What Prep Is Included
When you compare painting quotes, don’t just count how many coats are included. Ask what preparation is actually being done. A proper painter inspects the surfaces first and prices the prep the job needs, which might mean cleaning, filling, sanding, spot-priming, stain treatment and caulking before a drop of colour goes on. Two quotes can both say “two coats” and include completely different levels of prep, and that difference is usually exactly why one costs more than the other. Our guide on getting an accurate painting quote in Melbourne explains what should be assessed before you’re given a price.
Related Articles
Frequently Asked Questions
Work in order: clear and protect the room, wash the walls, treat any mould, fill holes and cracks, sand smooth, then spot-prime bare patches and stains. Skipping the cleaning or sanding steps is what usually leaves a rough or patchy finish, no matter how good the paint is.
Wash them with warm water and a little sugar soap on a sponge, working top to bottom, then rinse with clean water and let the wall dry fully before painting. Sugar soap cuts through the dust, hand oils and grease that stop paint gripping, and it's cheap and available at any hardware store.
Kitchen walls need degreasing, not just washing, because cooking grease is the top cause of paint not sticking. Use a stronger sugar soap solution or a dedicated degreaser on the splashback area and around the stove, then rinse well. If grease is heavy, a second wash is worth it before you prime.
A lightweight interior filler handles small nail holes and hairline cracks. For larger or recurring cracks, especially the ones above doors and windows in older homes that move seasonally, use a flexible filler and expect to do a second pass once the first shrinks. Deep holes should be built up in thin layers rather than one thick fill.
For patching small holes in plasterboard: clean out any loose material, press lightweight filler in slightly proud of the surface, and let it dry. Sand it flush with the surrounding wall, wipe off the dust, then spot-prime the patch so it doesn't flash to a different sheen under the topcoat.
Start with a medium grit around 120 to knock back filler and rough spots, then finish with a finer 180 to 220 grit for a smooth surface. The medium grit does the levelling; the fine grit removes the scratches the coarser paper leaves behind.
Use a sanding block or pole sander fitted with a vacuum attachment, or an extractor-connected sander for bigger jobs. Sand gently in a circular motion, and vacuum rather than dry-brushing the dust away. A slightly damp (not wet) wipe-down afterwards catches the fine dust that settles back on the wall.
Treat it before you fill or sand, and use a proper mould killer rather than household bleach, which often just lightens the surface and leaves the spores behind. Let it dry completely. Painting straight over mould means it grows back through the new paint, so if it keeps returning the underlying moisture problem needs addressing too.
Previously painted walls in sound condition, staying a similar colour and sheen, usually don't need a full priming coat, just a clean and a light sand. You do need to spot-prime any bare filler, patches, water stains or glossy areas, since those will flash or bleed through if painted over directly.
At a minimum: drop sheets, painter's tape, sugar soap and sponges, a filler and putty knife, sandpaper in medium and fine grits (or a sanding block), a mould treatment if needed, a stain-blocking or bonding primer for spot-priming, and a vacuum for dust. Having it all ready before you start saves stopping mid-prep to run to the hardware store.
Wall preparation for painting isn’t the glamorous part, but it’s the part that decides everything. Clean, treat mould, fill, sand, spot-prime, in that order, and the paint almost looks after itself. Rush it and no amount of premium paint will hide what’s underneath. If you’d rather the prep and the painting were done right the first time, without losing your weekend to sanding dust, that’s exactly what we do across Melbourne. Take a look at our painting services or get in touch for a proper on-site assessment.
Free quotes across Melbourne. Call 0498 200 654.
Pingback: Common Painting Problems in Melbourne's Older Homes - EQ Painting Solutions
Pingback: Painting Rendered Walls Melbourne: New vs Old Render Guide (2026)
Pingback: Ceiling Painting Melbourne: Cost, Prep & What Actually Lasts
Pingback: Painting Bathroom Tiles: What Works, What Peels & When to Re-tile
Pingback: Primer vs Undercoat: The Difference & Which You Need
Pingback: How Long Between Paint Coats? Recoat Times by Paint Type