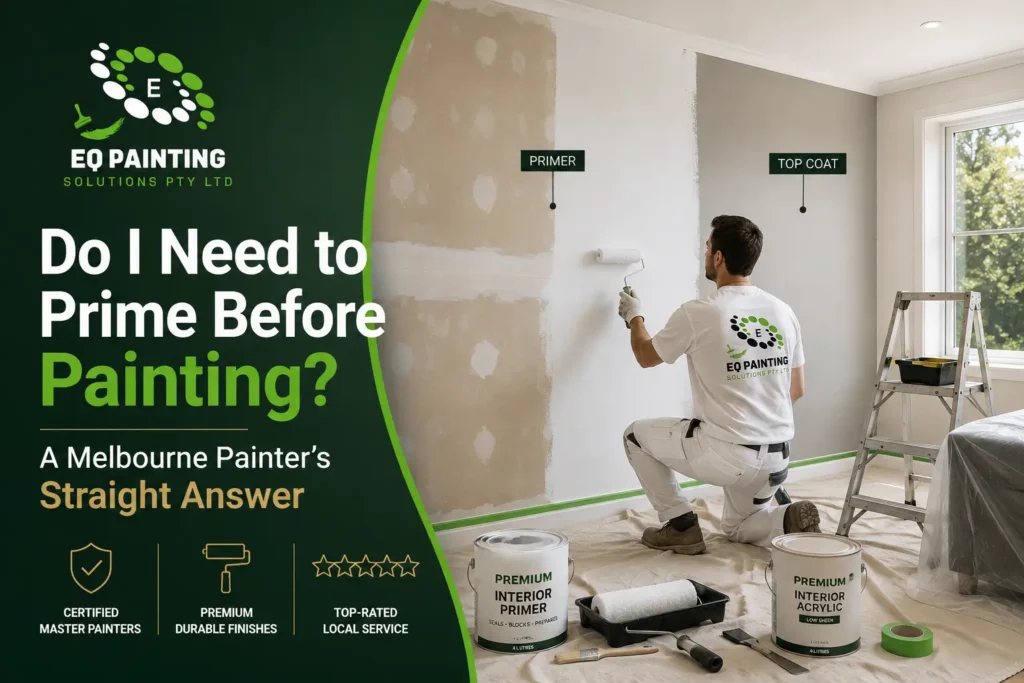
Last winter, a client in Brunswick called us after repainting a patched section of wall herself. She had removed an old picture rail, repaired the plaster, and applied two coats of paint without using primer. Within a week, every repaired section was showing through as dull, flat patches against the original wall.
It’s a problem we see regularly in Melbourne homes, and it leads to one of the most common questions we get on-site: Do I need to prime before painting?
The answer depends on the surface. Fresh plaster, repaired areas, stains, bare timber and some previously painted surfaces often need primer before a topcoat is applied. Other surfaces can be painted successfully without it.
In this guide, we’ll explain when primer is necessary, when you can safely skip it, and what can happen if you paint without priming first — based on what we regularly see in Melbourne homes.
Quick answer: You don’t need to prime every wall before painting. Sound, previously painted walls can often be cleaned, lightly sanded and recoated. Primer becomes important on bare plaster, fresh repairs, bare timber, stains, glossy surfaces and other substrates where the topcoat needs better adhesion or more even absorption.
When Primer Is Essential Before Painting
Bare timber is the obvious one. Untreated timber soaks paint unevenly, so you get patchy, dull sections called flashing unless you seal it first. This matters a lot on older Melbourne weatherboard homes, where bare or sanded-back boards are common after prep work.
New plasterboard behaves the same way, and it’s exactly what tripped up our Brunswick client. Fresh gyprock and the plaster compound used over joints and patches absorb paint at completely different rates, so skipping primer leaves a chequerboard of sheen once the topcoat goes on, even after two coats.
Bare render or brick needs a masonry primer or sealer, otherwise the surface keeps chalking and pulling moisture through the topcoat for months.
Water stains, nicotine marks and knots in timber all bleed straight through ordinary paint, sometimes through three coats, unless you spot-prime first with a stain-blocking primer.
For major colour changes, such as taking a dark feature wall back to white, a suitable primer or undercoat can reduce the number of finish coats needed and help achieve more even coverage.
When You Can Skip It
If the existing paint is sound, not chalky, cracking or glossy, and you’re staying a similar colour and sheen, a good quality paint will usually go straight on. A light sand to key the surface and a wipe-down is normally enough prep.
Where people get caught out is trusting a “self-priming” or paint-and-primer-in-one product to do more than that.
What About Paint-and-Primer-in-One?
Paint-and-primer-in-one products can work well over sound, previously painted surfaces, but they don’t replace a dedicated bonding, stain-blocking or masonry primer where the substrate requires one. We’ve stripped back more than a few DIY jobs where an all-in-one product was used straight over glossy kitchen cabinetry, and it failed the same way ordinary paint would.
Primer Types We Actually Use on Site
A water-based acrylic sealer undercoat handles most interior walls and new plasterboard, like the primer-then-topcoat sequence you’d see on any wall we’re patching and repainting. For glossy trims, doors and previously enamelled surfaces, a bonding primer lets you skip full sanding back to bare timber, which saves a lot of time on old Melbourne doors and skirting. For stubborn water stains, timber knots or nicotine marks, we often use a dedicated stain-blocking primer such as Zinsser B-I-N, depending on the surface and type of staining. Bare brick or render needs a proper masonry primer or sealer, not a wall primer, because it needs to handle alkalinity and moisture from the substrate itself.
What We See Go Wrong in Melbourne Homes
On weatherboard homes, skipping primer on bare or sanded boards is the single biggest cause of early peeling we get called out for, often within one Melbourne winter as the timber moves with moisture. In older homes around Brunswick, Fitzroy and Richmond with skim-coated plaster, missing the sealer undercoat shows up as patchy, flashing sheen under raking light within weeks, exactly what our Brunswick client saw on her patched wall. And in humid bathrooms and laundries, painting straight over old water marks without a stain-blocking primer means the stain reliably bleeds back through the new paint, sometimes within days. If mould is part of the problem rather than just staining, that’s a slightly different fix, worth reading alongside this one in our guide to mould-resistant paint.
If you’re not sure which category your walls fall into, that’s exactly the kind of thing worth having assessed properly rather than guessing. Our guide on getting an accurate painting quote in Melbourne covers what a painter should actually be checking on-site before pricing the job.
Related Articles
Frequently Asked Questions
The short version: primer isn’t something to use on every wall, but when the surface needs it, skipping it can mean patchy sheen, poor adhesion, stain bleed-through or an early coating failure, showing up in weeks rather than the years a proper job lasts. Bare surfaces, fresh repairs, stains and difficult glossy substrates are where the right primer really matters. If you’re not sure which side of that line your job falls on, that’s exactly the kind of thing worth getting assessed by someone who’s prepped hundreds of Melbourne homes rather than guessing from a paint tin label. Check out our painting services or get in touch for a proper look at the surface before you start.
Free quotes across Melbourne. Call 0498 200 654.
Pingback: Primer vs Undercoat: The Difference & Which You Need
Pingback: Why Is Paint Peeling Off the Wall? 8 Causes & Fixes